
🎭 Travel is Live Theatre – Why a Safari is More Than a Documentary 🎥 With today’s high-definition documentaries, you can see Africa’s wildlife in breathtaking detail without leaving your couch. So why do travelers still invest in a safari? Because watching is not the same as experiencing. A safari is like live theatre—organic, unscripted, and immersive. Unlike a film, where every scene is edited for perfection, a journey into the wild...
Safari Photography Tips: The Photographs Most People Drive Past
Posted by Neville on Fri October 9, 2026 in The Safari Experience.
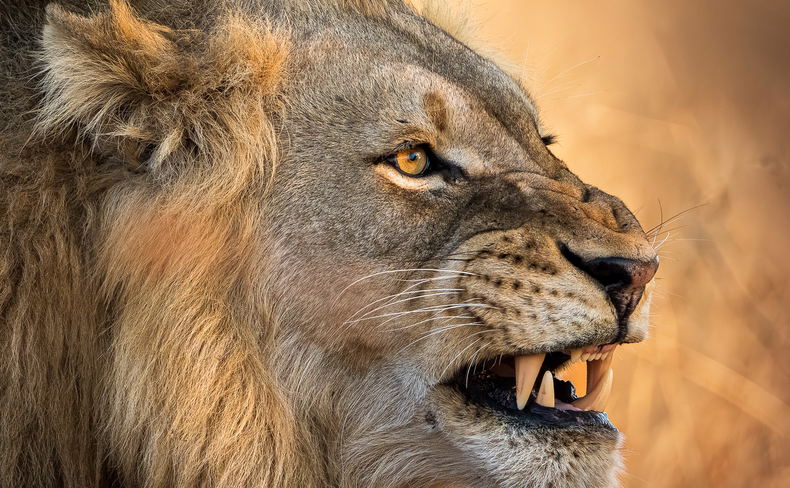
Safari photography tips from Neville Jones, founder of Experiential Travel, who has planned and led more than 130 African safaris: how to shoot into the light, photograph from below the eyeline, catch the moment after the obvious one, and work with your safari guide to get the images most people drive past.
Most safari photographs look much the same. The animal stands side-on in the middle of the frame looking directly at the camera, the sun is behind the photographer, and the sky is blue.
That isn’t because guides don’t know better. Many guides are excellent photographers in their own right. But on a classic safari most guests never ask their guide for photography advice, so the guide does what past guests have wanted: positions the vehicle between the animal and the sun, where most people think they should be. It’s the safest choice, in the same way a guide will assume you’d rather photograph a lion than an impala. Often that’s true. Not always.
The photographs people remember usually break one of those habits. Here are some of mine, and what made each one different. Very few needed special equipment. Most needed a different way of looking, and a conversation with the guide.
Turn towards the light
The usual approach is to keep the sun behind you, so the animal is evenly lit from the front.
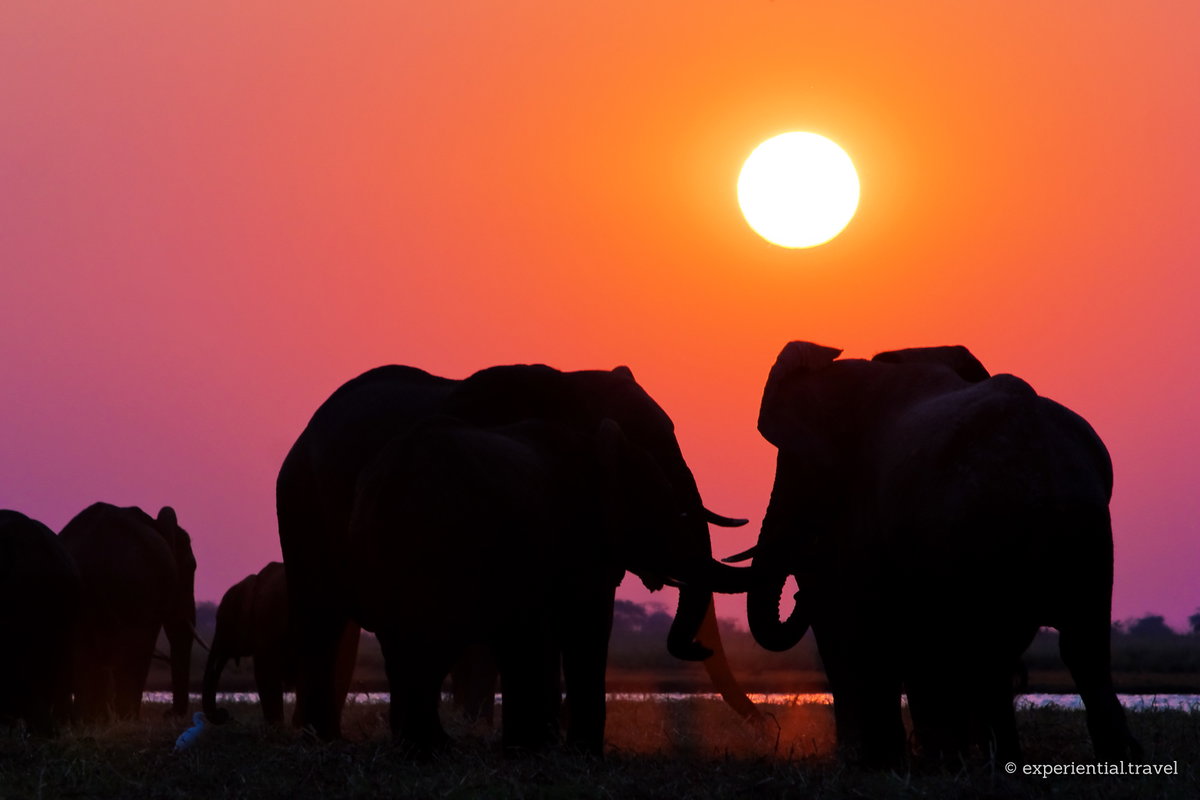
Shooting straight into the sun turns the subject into a silhouette. Detail disappears and the shape carries the picture, so look for clean outlines: trunks, tusks, ears.
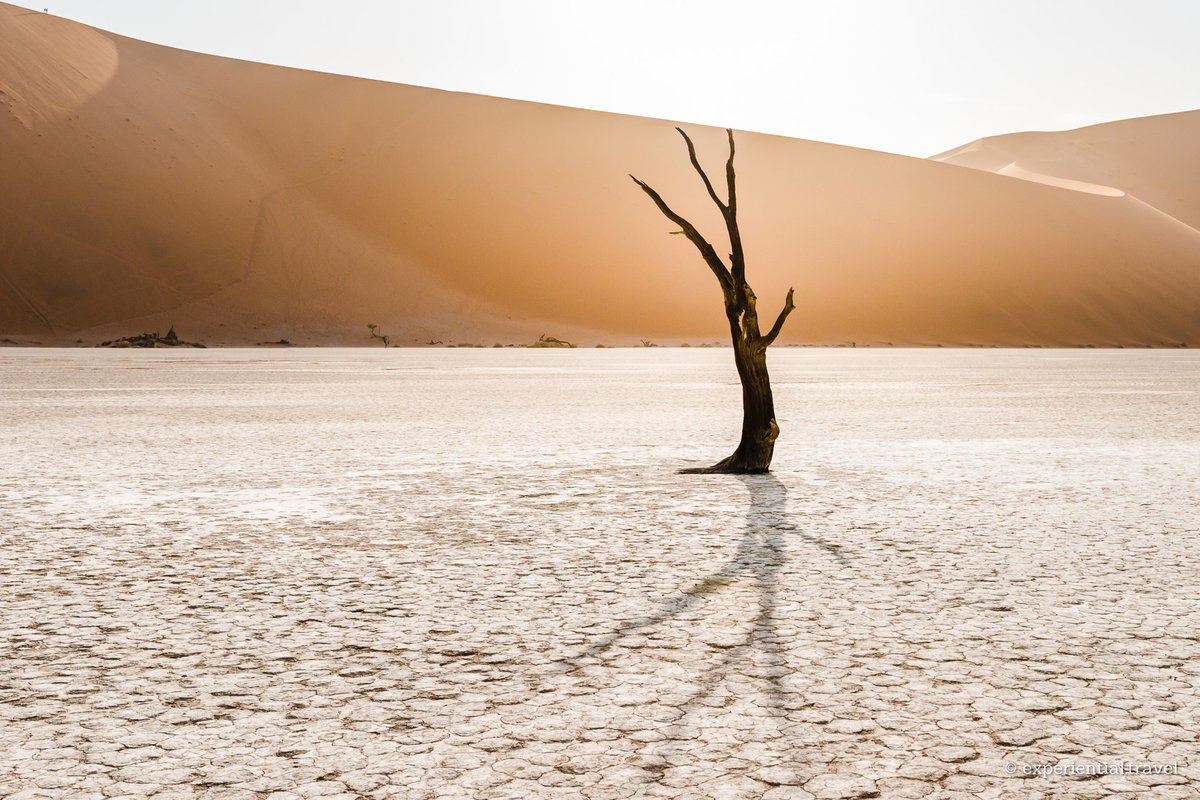
Almost every photograph of these trees has a bright blue sky. Facing into the sun washed the sky out and lit the dune behind, and the tree became the only dark thing in the frame.
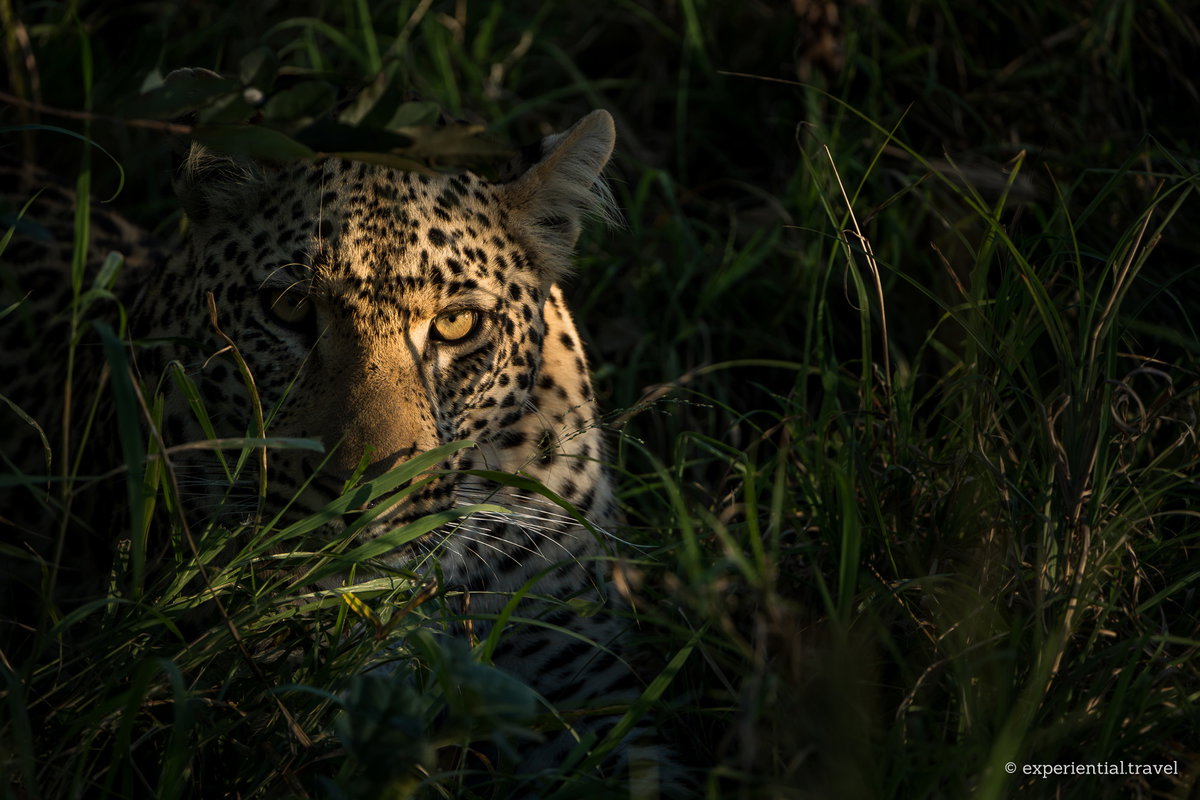
Sometimes the light finds the subject for you. A shaft of sun through the canopy lit one eye and little else. Most of the animal is hidden, and that’s why it works.
Let the darkness work for you
The usual approach is to put the camera away when the light fades, and to look for a bright, clean background.
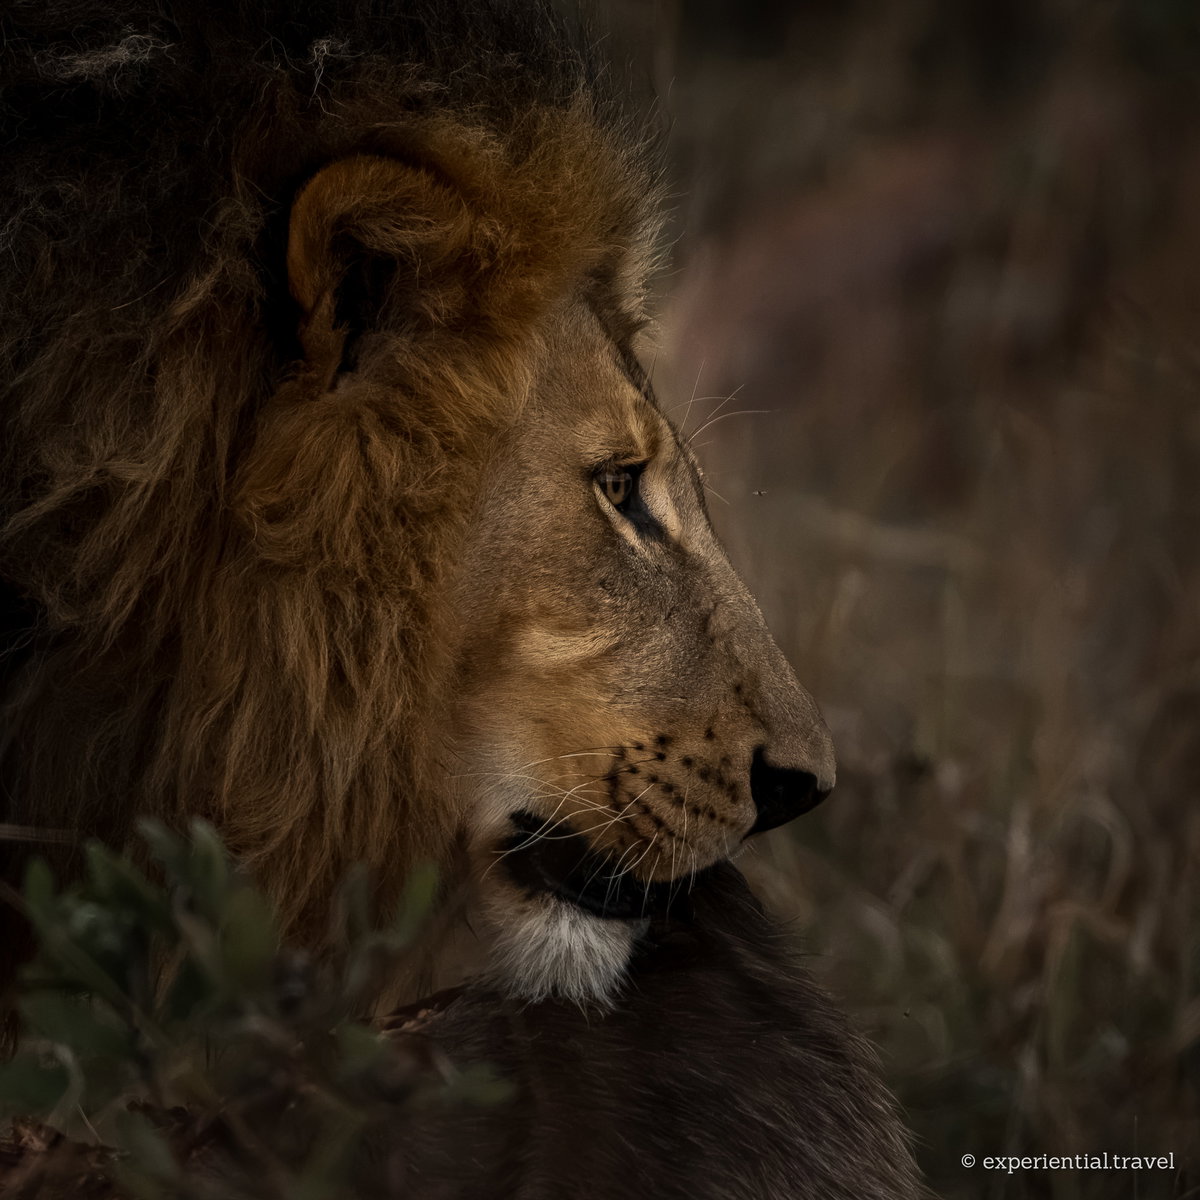
Modern cameras, and good phones, now record images in light that would have been hopeless a few years ago. The last light, and the light before sunrise, are worth staying out for.
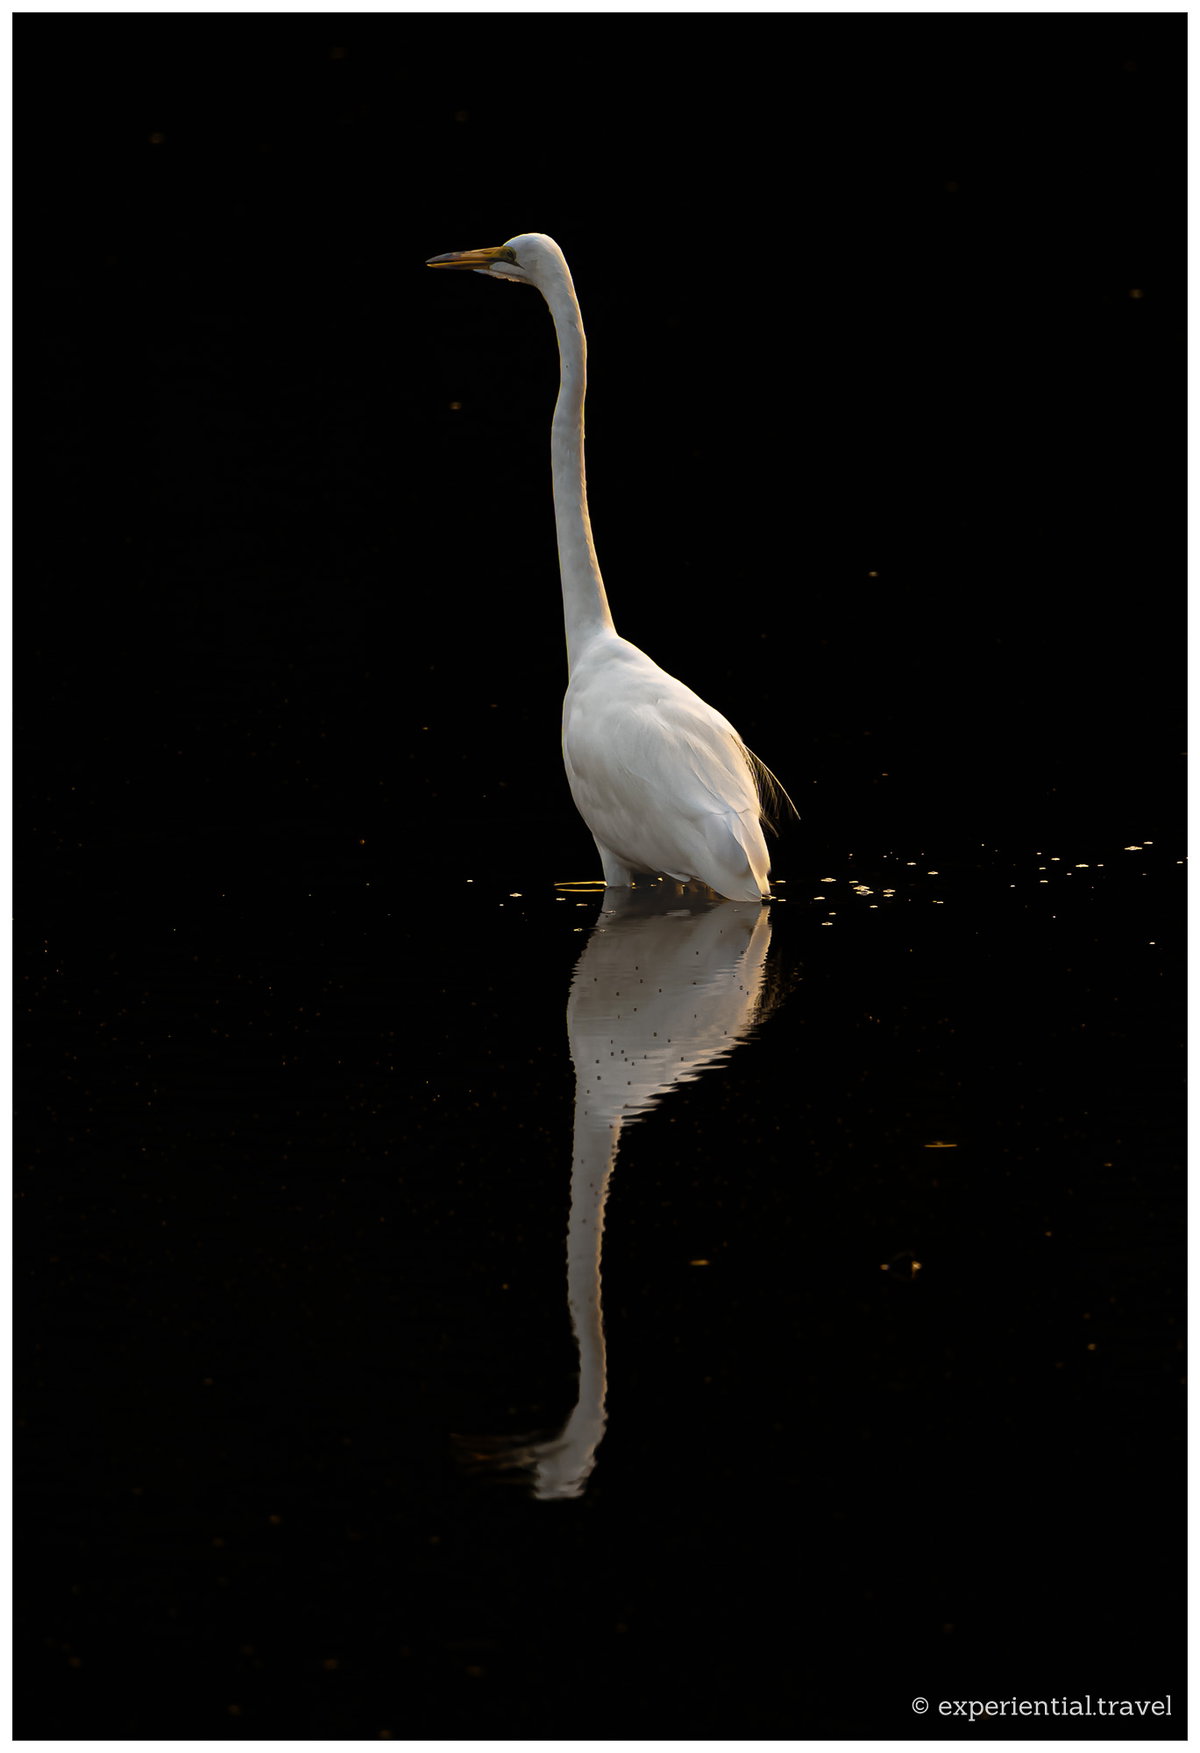
An egret is one of the commonest subjects there is. But finding one standing in very still water against a shadowed bank, possible only because the sun wasn’t behind the camera, makes this one very interesting.
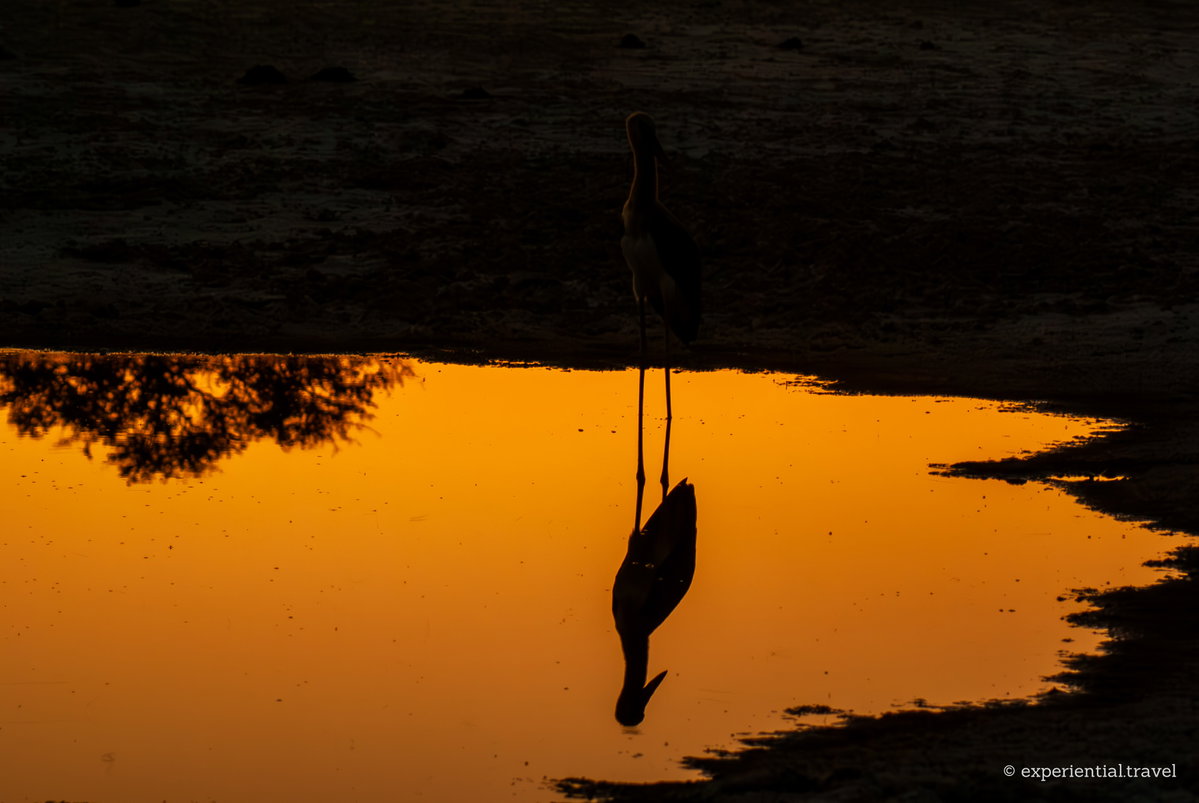
Sometimes the reflection is the picture. The bird itself is barely visible; its reflection in the sunset-coloured water tells the story.
Change your height
The usual approach is to photograph from your seat, looking slightly down on the animal.
Where the camera sits relative to the subject’s eyes changes how we feel about the subject. Below the eyeline, the subject dominates the viewer; above it, the viewer dominates the subject.
I first felt this at a management workshop. A manager was asked to reprimand one of his staff, a routine task for him, until the facilitator had him lie on his back while his colleague stood over him. He couldn’t deliver a word of it convincingly. The lesson came back years later while I was studying photography.
Try it with someone you barely know: a few frames from just above their eyeline, then a few from just below. A few inches change everything.
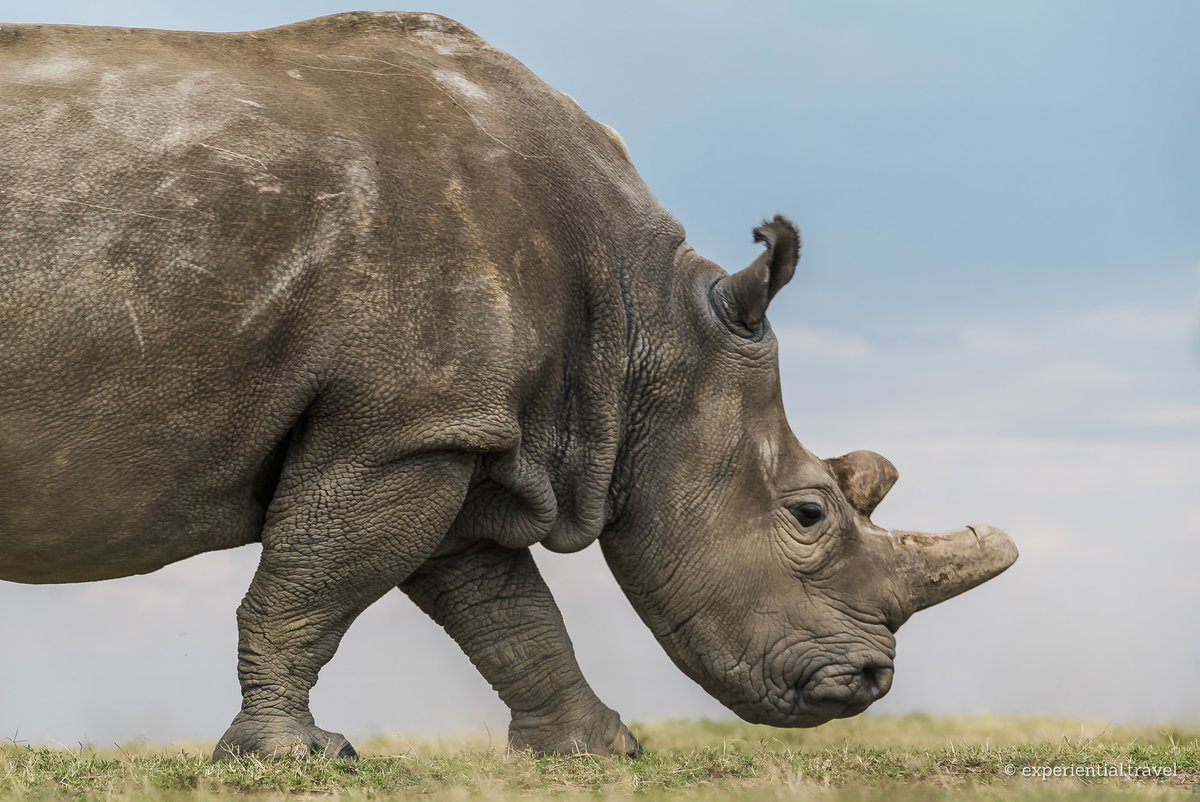
Look at where the horizon falls in this photo: around his toenails. The camera was level with his feet, and that’s why he dominates the frame. You can’t get out and lie on the ground, but you don’t need to. When the vehicle drops into a dip, or an animal stands on a rise, as this rhino did, make the most of it. Sitting in the lowest seat helps too.
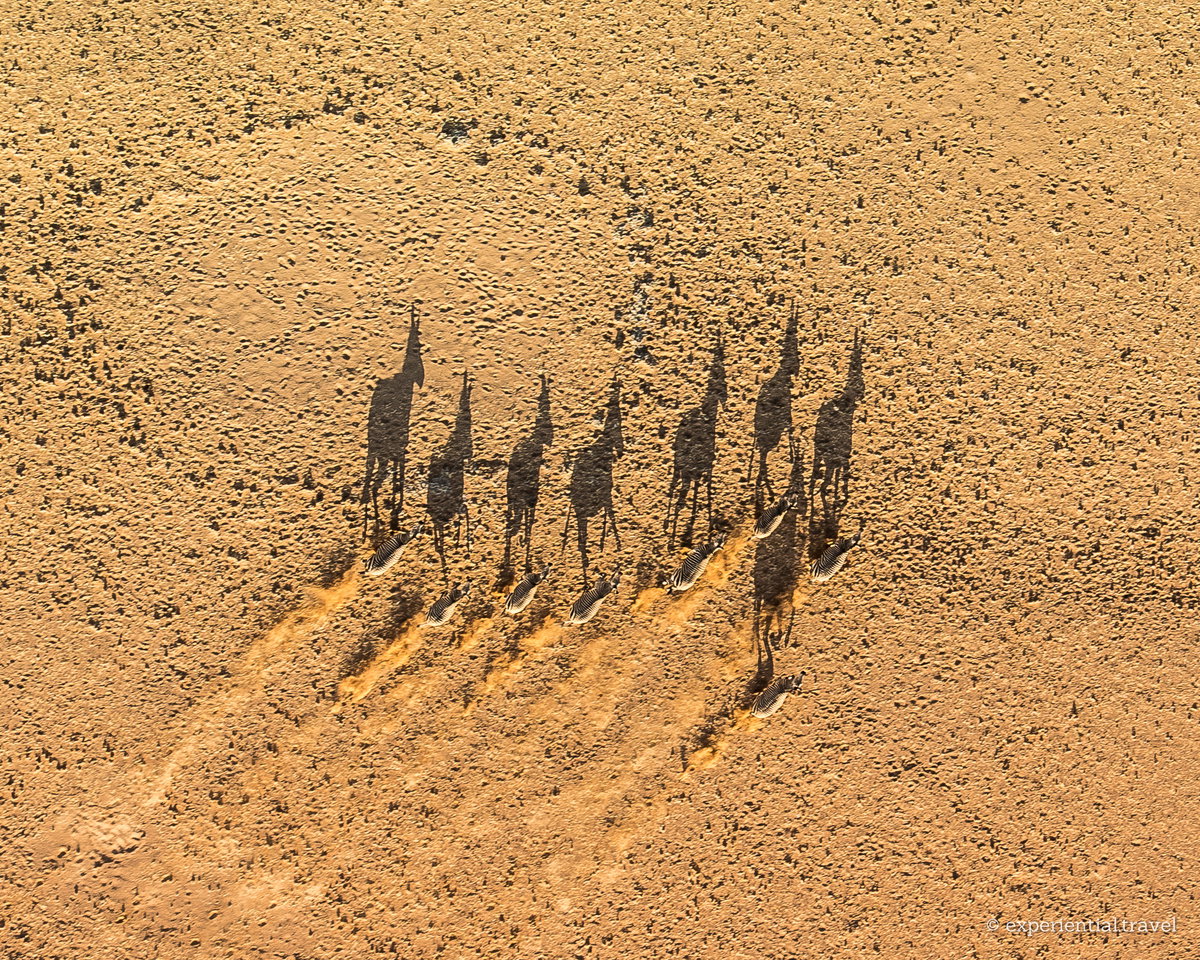
Looking straight down changes everything. This was taken from a hot-air balloon above a plain of fairy circles. It was a vaguely interesting scene until the zebra ran into it, and turned it into an arresting play of shadows.
Wait for the moment after
The usual approach is to photograph the obvious moment, then lower the camera.
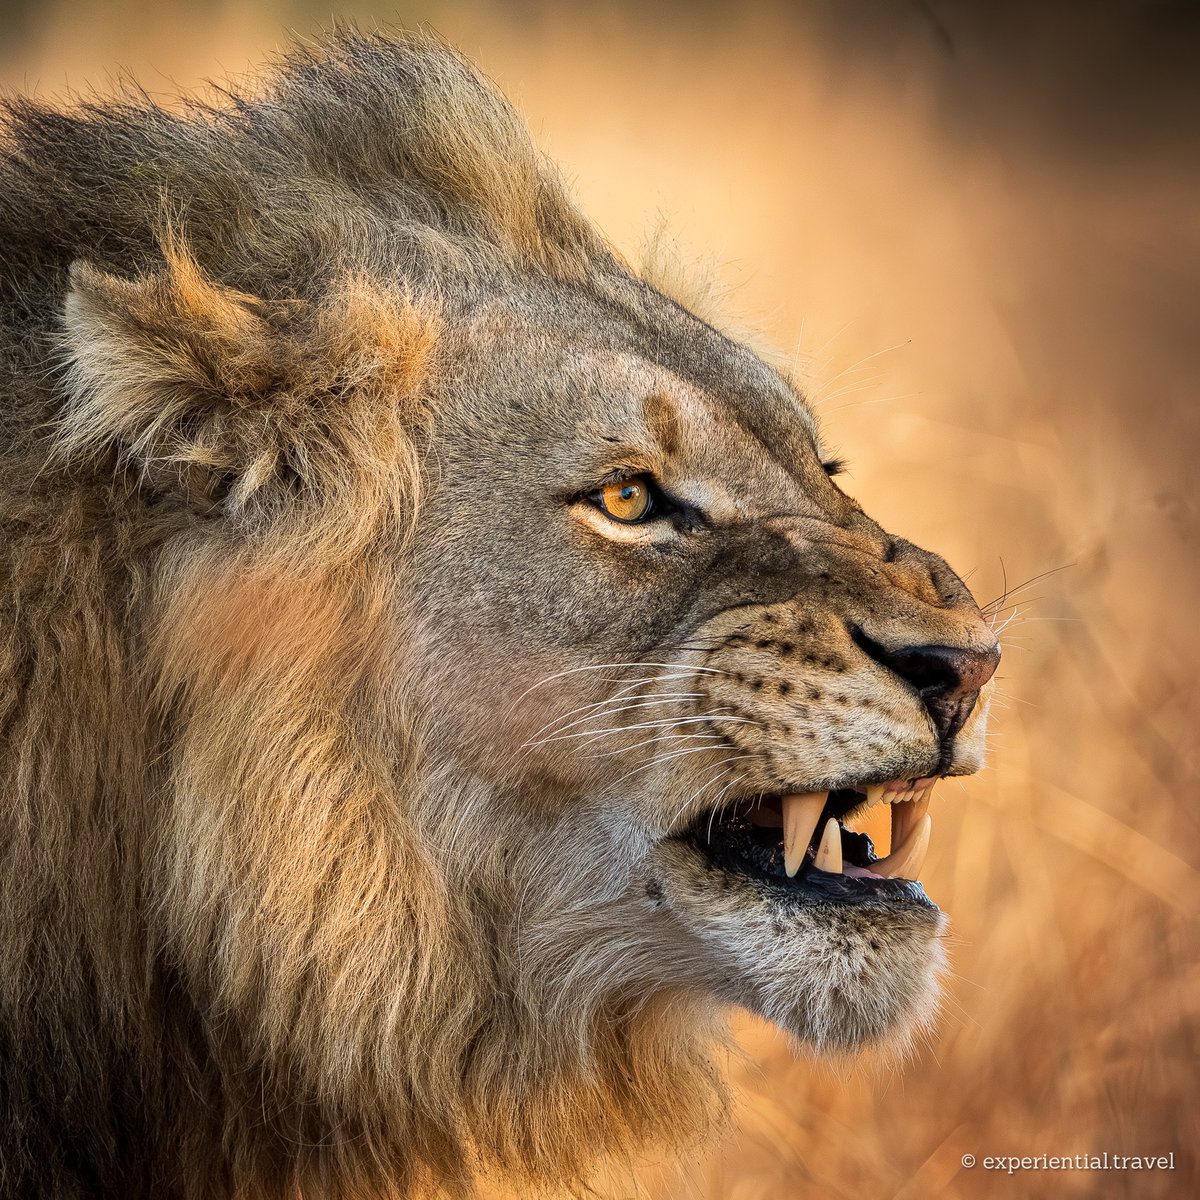
Everyone photographs the yawn itself. The expression as it closes lasts a fraction of a second, happens all the time, and is rarely caught. Keep shooting after the obvious moment.
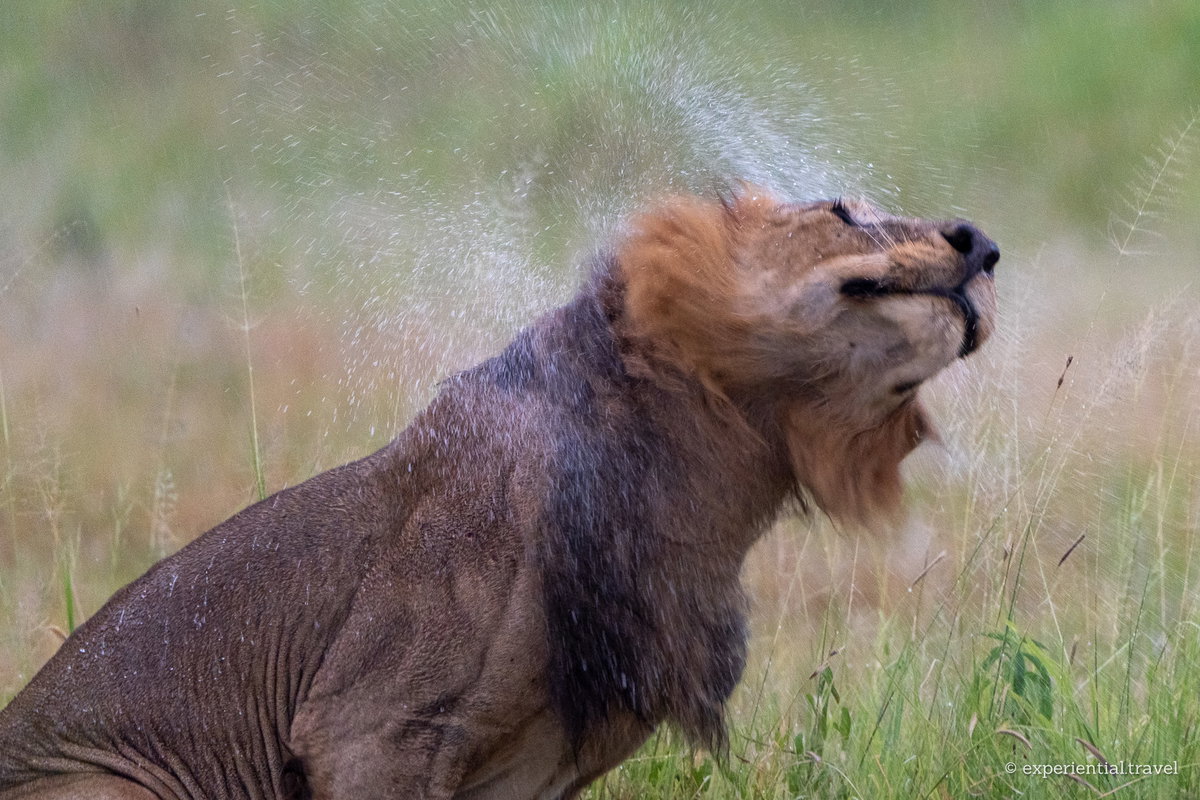
Rain sends most vehicles home. I like wet cats because they are the opposite of majestic: bedraggled, irritable and very active. A slower shutter speed turns the spray into movement.
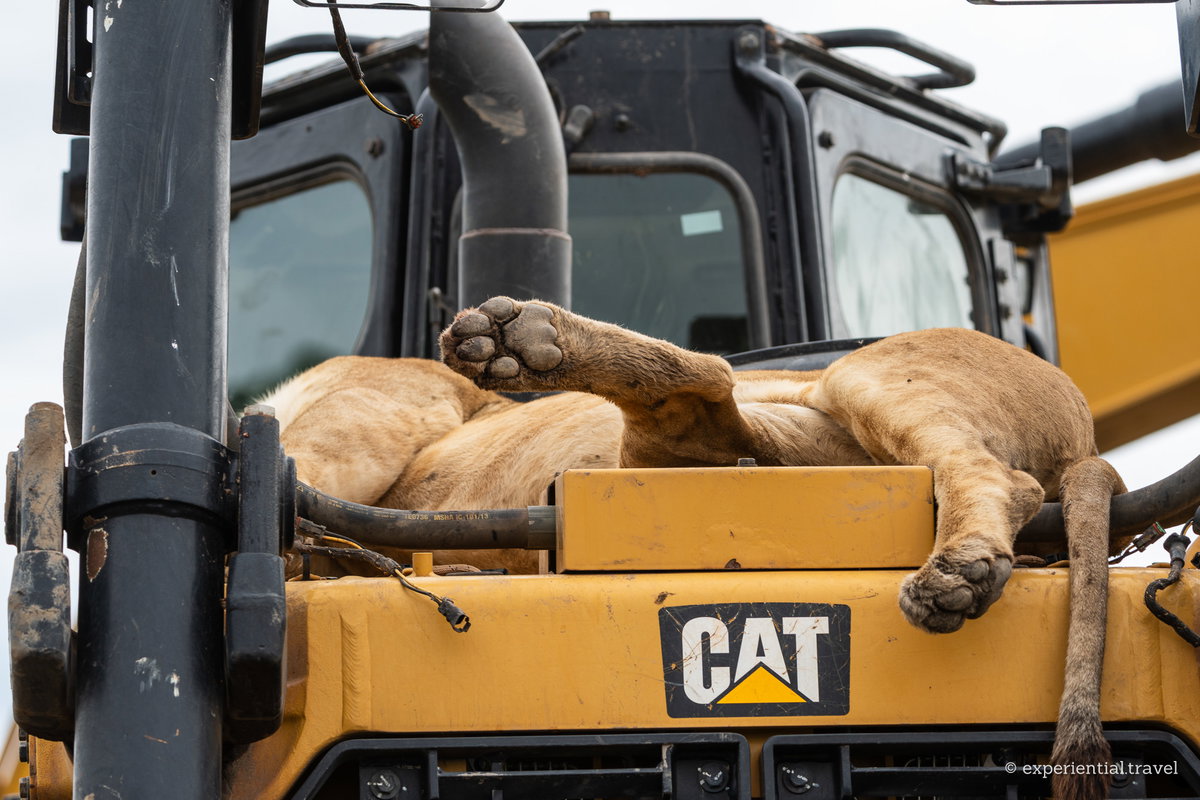
And sometimes Africa simply has a sense of humour. The picture that makes people laugh is often the one they remember.
Remember the background has a story
The usual approach is to fill the frame with the animal, using the longest lens you have.
I learned otherwise from my daughter, when she was the exclusive on-snow photographer at the Winter Games NZ. I’d assumed the photography would all be done with long lenses. But some of her most spectacular images showed the drama and scale of the mountains, with the athlete a speck, perhaps upside down, dozens of metres above the snow.
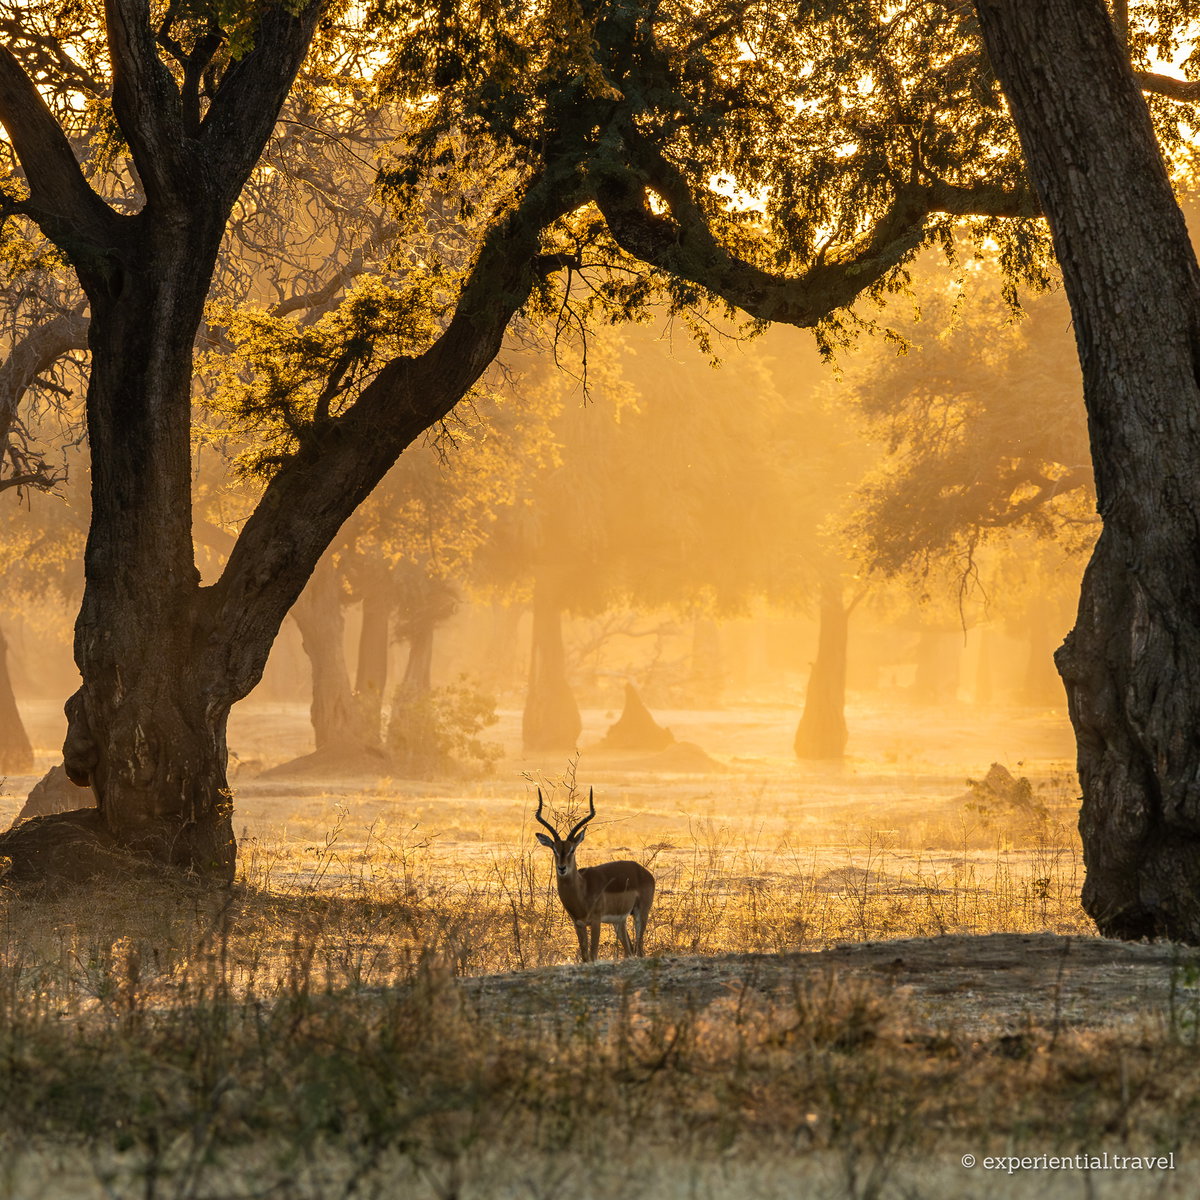
An impala is the animal most guests stop photographing by the second day, and guides learn to drive past them. Pull back, let the light and the trees tell the story, and it becomes a portrait of the place.
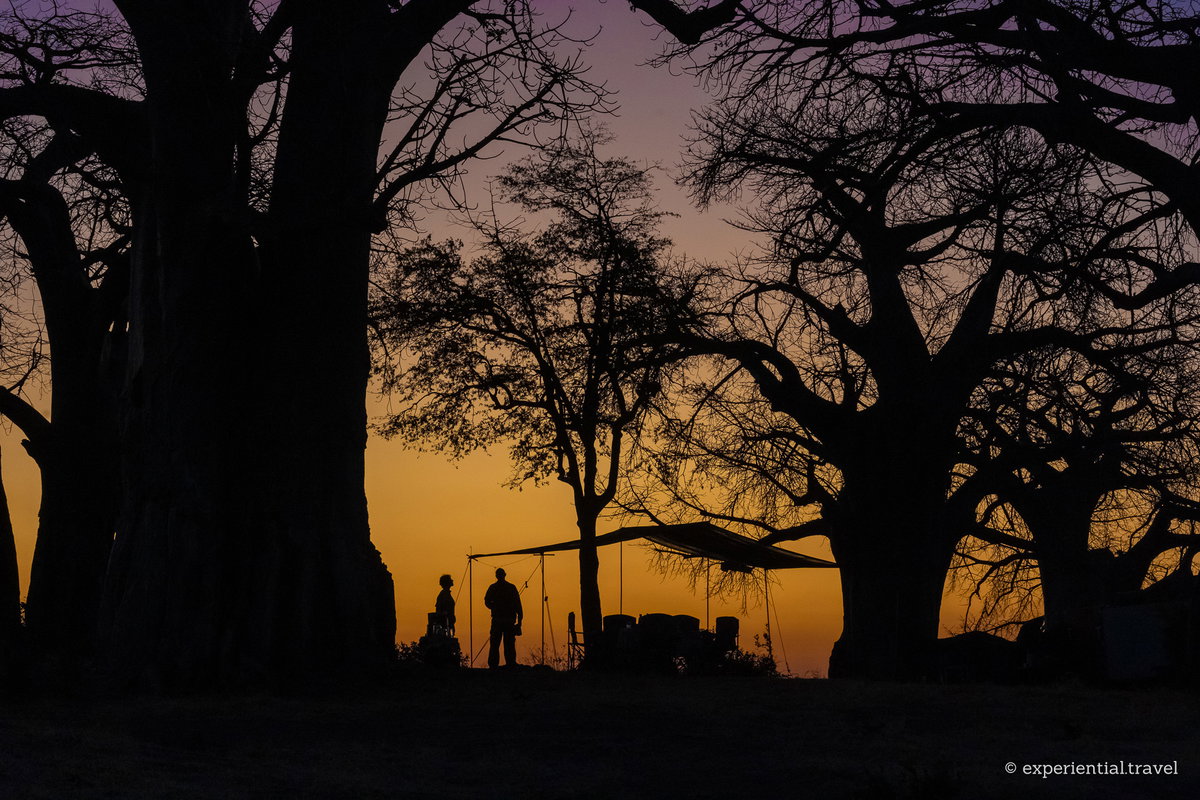
The same applies to people. A camp silhouetted against the last light says more about a safari than most close-ups.
Engage with your guide
The usual approach is to leave positioning to the guide, who will do what past guests have wanted.
In my experience every guide is keen to try something new. When guests choose seats, most head for the higher back rows. I take the front passenger seat, the lowest in the vehicle.
One afternoon in Welgevonden, our guide was hurrying us towards a male lion sitting on the far side of a sloping clearing. From our track he sat side-on, looking towards the sun, with shaded bush behind him. It was perfect, and we were about to drive past it.
“Stop,” I said quietly. The guide looked puzzled: he was taking us around to the side, the sun behind us, exactly where Kodak told Box Brownie owners to stand. I took a few frames and showed him the last one.
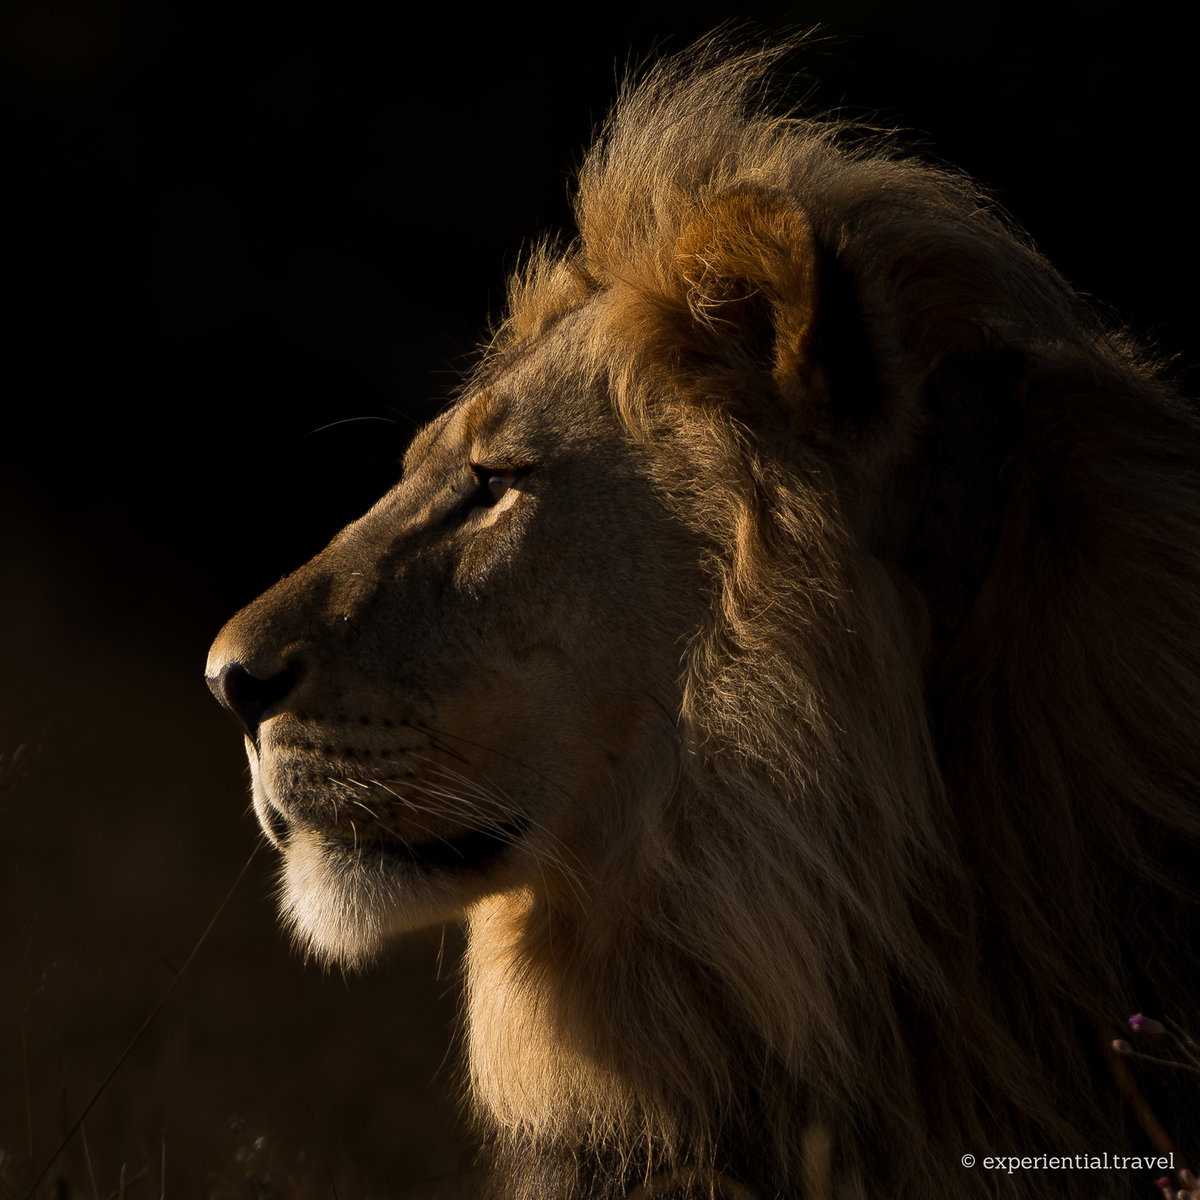
Guides are always generous about their guests’ photos, but his expression told me he hadn’t seen one like it before. On the way to the conventional spot, he asked how it worked, and about a couple of the other ideas here. I hope he’s sharing them with his guests now.
A few things help:
- On the first drive, show your guide two or three examples on your phone.
- Make it clear you’ll trade a clearer view for better light.
- Accept that repositioning takes time, and that other vehicles at a sighting limit where you can go.
A few practical notes
- “Perfection is the enemy of the good.” The best photographs make people feel something. Technical perfection pleases the experts but few others. Capture what you feel first.
- When shooting into the light, expose for the brightest part of the scene and let the shadows go dark. Counter-intuitively, when most of the frame is dark, set exposure compensation darker, not brighter. The camera assumes every scene should average out to mid-grey, so it tries to brighten all that darkness and blows out the subject. Dialling it down keeps the light where you saw it.
- You don’t need a beanbag. It’s an old rule, and it limits people who think they have to use one. Modern sensors are so sensitive that handheld is fine for more than 90% of wildlife photography. I rarely see professionals use beanbags, but they do practise holding the camera steady, so practise at home before you go.
- A simple rain cover means you can keep working when everyone else heads back to camp.
Four ways to do it
Woody Allen said that 80 percent of success is showing up. On safari that part is easy: you’re there. What you do with it is up to you, and we can arrange any of these.
Just being there. Bring a phone or a camera, use what’s in this article, and see what you come home with. Many of the best safari photographs are taken this way.
A guide who understands light. Photography can be a fairly selfish pursuit, and many enthusiasts don’t want to wear out their travelling companions. Some guides are excellent photographers themselves, and we can book guides who understand light (its intensity, angle and quality). They’ll put you in the right place at the right moment without turning the drive into a photography class.
A photography workshop. For those who want to go further, we work with a small number of world-class photography instructors to run workshops in the best wildlife photography setting on earth: learning and practice, in the field, every day.
No photography at all. True to our name, we want our guests to experience Africa, and that’s hard to do with your eye to a viewfinder. Some guests would rather one of us travel with them and take the photographs. They stay completely present on safari, and afterwards receive every photograph taken during the trip.
Common questions
What camera do I need for a safari?
Any modern phone or camera can produce beautiful safari images, especially in good light. Dedicated cameras still pull ahead in three situations: distant animals, very low light and fast action, where a phone’s small sensor and limited zoom show their limits. The best choice is the one you know well and will actually carry.
What lens should I take on safari?
Long lenses make beautiful animal portraits, but they are big, heavy and expensive, and they often say nothing about the place. To be honest, some long-lens portraits could have been taken in a zoo, and the tight framing can feel voyeuristic. Shorter, wider, lighter and cheaper lenses put the viewer in the scene, because their perspective is closer to what the human eye sees.
Do I need a beanbag or a tripod on safari?
No. Modern sensors are sensitive enough that handheld is fine for more than 90% of wildlife photography; practise holding the camera steady at home before you go. A tripod is useful for night-sky photography or time-lapse at camp, not on game drives.
Where should I sit in a safari vehicle?
It depends what you want. The lowest seats, usually at the front, are best for photography, because they put the camera below the animal’s eyeline. The highest rows are best for binoculars and simply taking it all in. The original front seats are usually the softest, and the rows centred between the axles give the smoothest ride.
Can I ask my safari guide to position the vehicle for photography?
Yes. Guides usually position the vehicle where past guests have wanted to be, with the sun behind them. In our experience every guide is keen to try something different: show them an example on your phone and make it clear you’ll trade a clearer view for better light.
Further Reading
The Wild Stage
Fri February 7, 2025
Read This Article
Why You Can’t (and Shouldn’t) Try to Schedule Wildlife
Wed April 1, 2026
Read This Article
Can wildlife be predicted or guaranteed on safari? It’s a question we’re often asked — particularly by first-time travellers. The short answer is no. More importantly, trying to do so misunderstands what a safari is, and risks diminishing what makes it extraordinary.
Regenerative Safaris: Where Luxury Helps Heal the Land
Sat March 22, 2025
Read This Article
What if your safari didn’t just tread lightly—but actually gave back to the land and people that made it possible? That’s the promise of a new kind of safari: one that goes beyond sustainability and into something even more powerful—regeneration.
Share This Post